Thursday, June 21, 2018
The 7th Annual Normandy Park Garden Festival!
The 7th annual Normandy Park Garden Festival & Plant Sale is fast approaching! Our special guest speaker this year is moss guru Chance Justbe. He will be demoing how to create kokedamas, aka hanging moss planters. These beautiful and functional sphere-shaped containers will spice up any corner of the garden.
As always, we'll be serving a free lunch at high noon and selling lots of amazing plants.
We'd once again like to thank Teresa Savage, CRPC, for sponsoring this event and being an all-around amazing person. If you have any questions pertaining to retirement, she will be there and will be happy to discuss them with you!
Date: Saturday, July 7th, 2018
Schedule:
11am - Plant sale & gardens open
High noon - Lunch is served
1pm - Chance Justbe's talk
3pm - Plant sale ends
Please park at Marvista Park and follow the signs to the festival from there!
Friday, June 30, 2017
The 6th Annual Normandy Park Garden Festival
The barbecue is firing on all gas cylinders once again for the 6th annual Normandy Park Garden Festival on Saturday, July 8th, 2017! None other than world-renowned plantsman Sean Hogan will be our keynote speaker talking about his favorite plants to grow in our quasi-Mediterranean climate. Invite your friends and neighbors, bring the kids, and clear some space in your trunk for some of Sean's irresistible plant selections.
It's 100% free - see ya'll there!
BIG thank you to Teresa Savage, CRPC Financial Advisor at Merrill Lynch, Pierce, Fenner & Smith, Inc. for helping sponsor this event!
Date: Saturday, July 8th, 2017
Schedule:
11am - Plant sale & gardens open
High noon - Lunch is served
1pm - Sean Hogan's talk
3pm - Plant sale ends
Please park at Marvista Park and follow the signs to the festival from there!
Sunday, July 24, 2016
There is no tour on July 31st!!!
The post about the garden tour was for LAST year - sorry for the confusion! The NHS Meet the Board tour this year is on Sunday, August 13th, 2017. Join NHS for more info!
Wednesday, July 6, 2016
The 5th Annual Normandy Park Garden Festival
It's happening! The 5th annual Normandy Park Garden Festival will be held on Saturday, July 9th from 11-3 in the Galicic garden. Stop by and tour the gardens & plant sale all while nibbling on a crowd-sourced lunch way better than what you would probably be eating otherwise. We scaled things down a bit this year with no garden talk, but everything else is firing on all cylindars! Free as always. Hope to see you there!
Note: If you're going to be driving here, please park on the WEST side of the street (our friendly neighborhood officer loves to ticket law-breaking savages who park on the sidewalk). You can also park at Marvista Park and follow the ample signage to the festival from there.
For questions, please contact Justin Galicic at jgalicic@gmail.com. See you there!
Sunday, January 3, 2016
Life in the Amazon
Walking down to Pike Place Market a few weeks ago, I noticed they finally took the fencing down from the first building in the new Amazon mega campus. So I took a little stroll through. Their selection of plants had me salivating.
My first thought was someone who really likes Dan Hinkley designed the landscaping. I later found out that he was hired as a consultant for the project.
There were lots of nooks and crannies filled with interesting plants. Because of the towering canopy of the skycrapers, all of the plants here are adapted for shade.
I can't say it's all good. I want to like this plant's blackness but seeing it here finally made me realize it's just not black enough to qualify as a black plant. I guess it's still slightly better than an azalea.
Just across the street, construction is well underway for the greenhouse that will house more tropical plants. I have been told that some plants that are outgrowing the conservatory at the Rhododendron Species Garden in Federal Way will move here. At the rate it's going I'd say they should be done with it by summer.

My first thought was someone who really likes Dan Hinkley designed the landscaping. I later found out that he was hired as a consultant for the project.
![]() |
| Looks like Holboellia coriacea, Beesia deltophylla, and Adiantum venustum |
![]() |
| This Holboellia vine, located directly in front of a heat exhaust vent, was already strutting its fragrant flowers. |
![]() |
| This looks like Disporopsis, Disporum, and Beesia. |
![]() |
| Evergreen hydrangea relative Dichroa febrifuga |
![]() |
| Close up of Dichroa febrifuga's metallic-purple berries |
Just across the street, construction is well underway for the greenhouse that will house more tropical plants. I have been told that some plants that are outgrowing the conservatory at the Rhododendron Species Garden in Federal Way will move here. At the rate it's going I'd say they should be done with it by summer.

Thursday, August 20, 2015
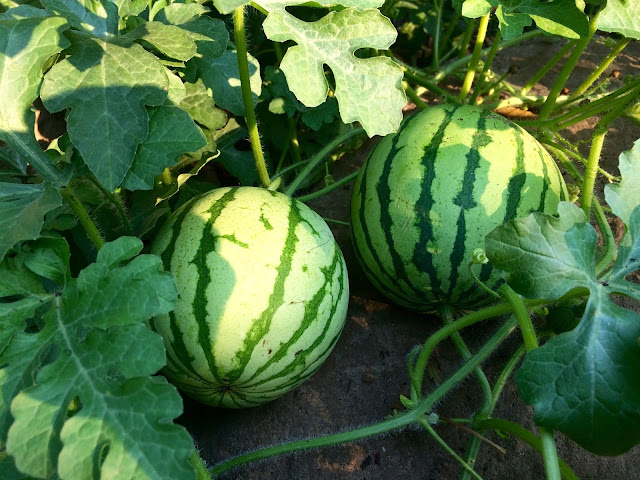
Apparently we can grow watermelons!
If you live in Miami, Los Angeles, or Phoenix, you probably don't care that us Seattle folk just celebrated our 13,232nd minute of 80° (26.6°C) temps or higher this summer. Well it's a big deal to us and this being our hottest summer ever in the Pacific Northwest, I can finally say that I have successfully grown watermelons:
![]() |
| Watermelon 'Sunshine' |
And cantaloupes and eggplants too:
This is a practically instant castor bean forest. There will be plenty of seeds to share!
![]() |
| Ricinus communis 'Carmencita' |
I was floored to see Gloriosa rothschildiana come back to life. It didn't pop up out of the ground until mid-June but it has been making up for lost time, completely devouring this magnolia tree.
![]() |
| Gloriosa rothschildiana |
![]() |
| Alocasia (unknown species) |
![]() |
| Peach 'Frost' |
![]() |
| Unknown crape myrtle & Rose 'Just Joey' |
![]() |
| 'Lakemont' seedless grape |
I guess it's a good sign if the fish are always begging for food.
Monday, May 4, 2015
Rock On!
Real is pretty much always better than fake, but when it comes to rocks, there's just something about an artificial rock that I find fascinating. Armed with some mortar mix and a few how-to videos off YouTube, I set out to create a few of my own.
Here is the before shot:
Step 1: I planned to create five rocks total, and wanted a nice balance of tall and short. So I bent 3/8" thick rebar with my foot into the shape I wanted and wrapped some 1/4" hardware cloth around the rebar skeleton. I secured the hardware cloth to the rebar with wire in as many places as I could to help rigidify the hardware cloth.
Step 2: There are a few keys to getting a fake rock to look like the real thing. The first is the shape. Rocks are usually very angular. Maybe it broke off from a bigger piece of rock and has slowly eroded over time to round off its corners. Whatever its story might be, it has to look like it has been sitting around for at least a few thousand years.
Step 3: I experimented with different mortar mixes. This mixture in the photo below is a 3:2 mix of Portland cement to Lane Mountain sand. It hardened into a very dense material that was completely smooth and rock-like.
Step 4: I wanted the rocks to be orange, brown, and grey in order to match the brick pathway surrounding them. I knew it was important to vary the color of each rock while maintaining a cohesive palate. In each batch of mortar mix I made, I put in different amounts of color so that no two batches would be exactly the same. This is still the first coat (aka "scratch coat") but some of it is going to show through.
Step 5: Most of the rocks I made are hollow, but I found a great way to hide the scraps of paver stones left over from making the pathway. No one will ever know!
Step 6: After allowing the scratch coat to dry, I applied the second and final coat. Then I took some crumpled up aluminum foil and pressed it against the surface of the rock to texturize it. I let it dry for a few hours until the cement had the consistency of packed sand, and then took a paintbrush and brushed over the entire rock. At this point the cement is at the perfect stage for making cracks, dents, and crevices and then eroding it away with the paintbrush. Basically it's just a matter of messing with it until it looks like a real rock.
Here is the final picture before I started getting carried away adding plants:
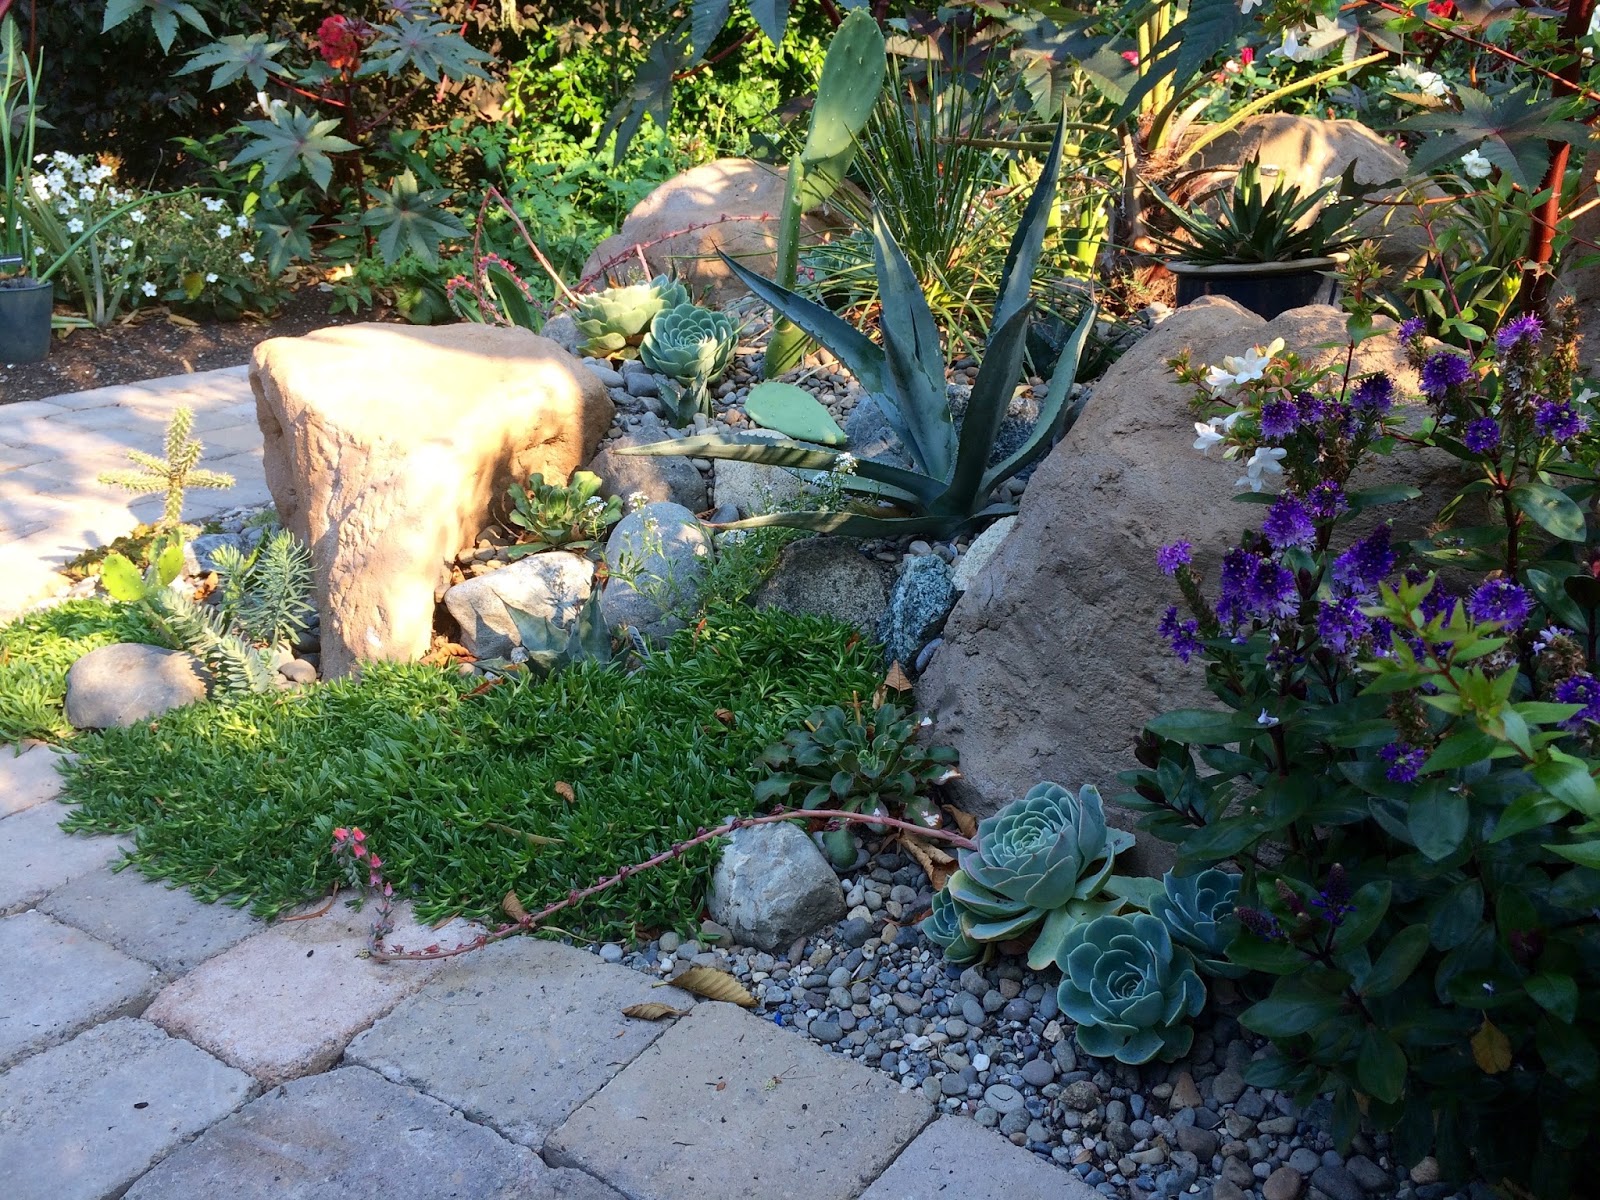
And now these heat-loving plants have a new little slice of paradise to call home.
So now you want to create your own rock, right? Let me know how it goes! The total cost was around $200, or about $40 per rock. Definitely cheaper than buying a real rock - which would also include renting a backhoe to move it into position. The time it took was around 15 hours total or 3 hours per rock. I am sure if I were to do this again I could do it in 10 hours now that I know what I am doing.
Here are the materials I used:
Tools:
- Wheelbarrow for mixing
- Rubber gloves (wet cement is caustic)
- Shovel for mixing
- Small bucket to hold mortar mix when applying it
- Triangular trowel to apply the mortar mix to the hardware fabric
- Aluminum foil
- Paint brushes with different sizes and thicknesses
Ingredients:
- 4'x3/8" rebar poles
- 1/4" hardware fabric
- Mortar mix
- Water
- Cement color
Step 1: I planned to create five rocks total, and wanted a nice balance of tall and short. So I bent 3/8" thick rebar with my foot into the shape I wanted and wrapped some 1/4" hardware cloth around the rebar skeleton. I secured the hardware cloth to the rebar with wire in as many places as I could to help rigidify the hardware cloth.
Step 2: There are a few keys to getting a fake rock to look like the real thing. The first is the shape. Rocks are usually very angular. Maybe it broke off from a bigger piece of rock and has slowly eroded over time to round off its corners. Whatever its story might be, it has to look like it has been sitting around for at least a few thousand years.
Step 3: I experimented with different mortar mixes. This mixture in the photo below is a 3:2 mix of Portland cement to Lane Mountain sand. It hardened into a very dense material that was completely smooth and rock-like.
Step 4: I wanted the rocks to be orange, brown, and grey in order to match the brick pathway surrounding them. I knew it was important to vary the color of each rock while maintaining a cohesive palate. In each batch of mortar mix I made, I put in different amounts of color so that no two batches would be exactly the same. This is still the first coat (aka "scratch coat") but some of it is going to show through.
Step 5: Most of the rocks I made are hollow, but I found a great way to hide the scraps of paver stones left over from making the pathway. No one will ever know!
Step 6: After allowing the scratch coat to dry, I applied the second and final coat. Then I took some crumpled up aluminum foil and pressed it against the surface of the rock to texturize it. I let it dry for a few hours until the cement had the consistency of packed sand, and then took a paintbrush and brushed over the entire rock. At this point the cement is at the perfect stage for making cracks, dents, and crevices and then eroding it away with the paintbrush. Basically it's just a matter of messing with it until it looks like a real rock.
Here is the final picture before I started getting carried away adding plants:
And now these heat-loving plants have a new little slice of paradise to call home.
So now you want to create your own rock, right? Let me know how it goes! The total cost was around $200, or about $40 per rock. Definitely cheaper than buying a real rock - which would also include renting a backhoe to move it into position. The time it took was around 15 hours total or 3 hours per rock. I am sure if I were to do this again I could do it in 10 hours now that I know what I am doing.
Here are the materials I used:
Tools:
- Wheelbarrow for mixing
- Rubber gloves (wet cement is caustic)
- Shovel for mixing
- Small bucket to hold mortar mix when applying it
- Triangular trowel to apply the mortar mix to the hardware fabric
- Aluminum foil
- Paint brushes with different sizes and thicknesses
Ingredients:
- 4'x3/8" rebar poles
- 1/4" hardware fabric
- Mortar mix
- Water
- Cement color
Thursday, February 26, 2015
The 2015 Northwest Flower & Garden Show
The timing of the Northwest Flower and Garden Show in mid-February coincides perfectly with the capitulation of winter. The endless arrays of flowers are always a sight to see, but the richness of the show for me is in its fresh ideas.
West Seattle Nursery repurposed left over Christmas trees by slicing up their trunks and drilling holes to create mason bee huts.
If you look closely, just about everything was made from sliced up Christmas trees. This dwarf peach is awesome.
I have a thing for hardy palm trees, unfortunately these were a little out of my price range.
Most things were not so practical.
Wouldn't it be awesome if the moon was really that big?
This Chinese art dealer had some really interesting stuff at pretty reasonable prices.
![]() |
| Euphorbia grandicornis |
Finally perhaps this is a bit of a rorschach test - what's the first thing you think of when you see these glass art figures? If you see sarracenias and podophyllums, you're probably a true plant geek.
Sunday, January 11, 2015
The Mad Propagationist, Part 1
Before the discovery of heat mats, the gardening year for me would end in October and start up again in March. The only horticulturally stimulating thing that ever really happened during winter was venturing outside during the occasional arctic blast to wrap Christmas lights and blankets around some of the more subtropical plants (not fun).
Now that I'm armed with a greenhouse and a propagation station in the garage, the gardening year never ends.
To create my pocket-sized propagation paradise, I put a 48"x20.5" heat mat from Home Depot on the workbench in the garage and hung two fluorescent light fixtures 24" above the mat. Each fixture has four light tubes producing 2600 lumens of light for a grand total of 20,800 lumens. I have the lights on a timer so they are on for exactly 12 hours a day. I also have the heat mat plugged in to an ordinary lamp dimmer so I can adjust the temperature as needed.
The great thing about having this station in the garage as opposed to a greenhouse is slugs & bugs can't find it. It is also very helpful in rooting cuttings and starting seedlings because the air temperature is in the 45-60 degree range while the root temperature is in the 60-75 degree range. Because the root temperature is about 10-20 degrees warmer than the air temperature, the plants focus on developing strong root systems and don't get too tall or floppy. Let's take a look at what I have growing here at the moment:
Now that I'm armed with a greenhouse and a propagation station in the garage, the gardening year never ends.
| The propagation station |
The great thing about having this station in the garage as opposed to a greenhouse is slugs & bugs can't find it. It is also very helpful in rooting cuttings and starting seedlings because the air temperature is in the 45-60 degree range while the root temperature is in the 60-75 degree range. Because the root temperature is about 10-20 degrees warmer than the air temperature, the plants focus on developing strong root systems and don't get too tall or floppy. Let's take a look at what I have growing here at the moment:
| Ensete ventricosum 'Maurelii' pups resprouting from the base |
![]() |
| Rooted leaf cutting of an unknown begonia (From Steve Hootman at the RSBG), rooted Fuchsia 'Hawkshead' cutting, and a Beschorneria yuccoides seedling |
![]() |
| Bulbules & roots forming on the leaf of Eucomis 'Rhode Island Red' |
Learning how to propagate plants is really all about failing upward. This sweet bay cutting was taken way back in September 2013 (15 months ago) yet has still refused to root! Four out of the 30 or so cuttings that I originally took are still alive after going 15 months without having any roots whatsoever (most of the others rooted within a few months). This one even produced four new leaves in the meantime. Plants are amazing.
![]() |
| A stubborn Laurus nobilis cutting |
I have also taken some hardwood cuttings outside. Here, are Deutzia 'Pink-A-Boo' branches that are about to be mostly buried in a pot of peat moss, left and forgotten about for three months, and then hopefully rooted to become new clones of the original. I've also taken some hardwood cuttings from willow, grape, and fig branches.
![]() |
| Deutzia 'Pink-A-Boo' branches |
Plant propagation takes a lot of patience and diligence but is at the same time endlessly rewarding even for the average gardener who isn't interested starting their own nursery. Stay tuned to see what else is being replicated in the greenhouse...
Subscribe to:
Posts (Atom)